Email Application Setup: Apple Mail
Overview
This guide shows you step-by-step how to set up an email account in Mail on MacOS.
Add New Account
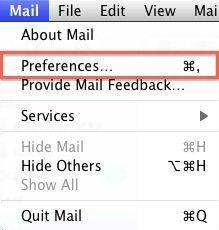
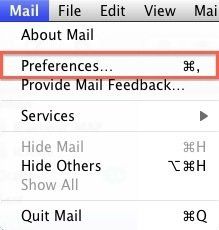
- Choose Preferences from the Mail menu.
- Select Preferences.
3. Click on the Accounts icon in the Mail Preferences window.
4. On the Accounts window, click the + (plus) sign to create a new account.
Account Settings
1.
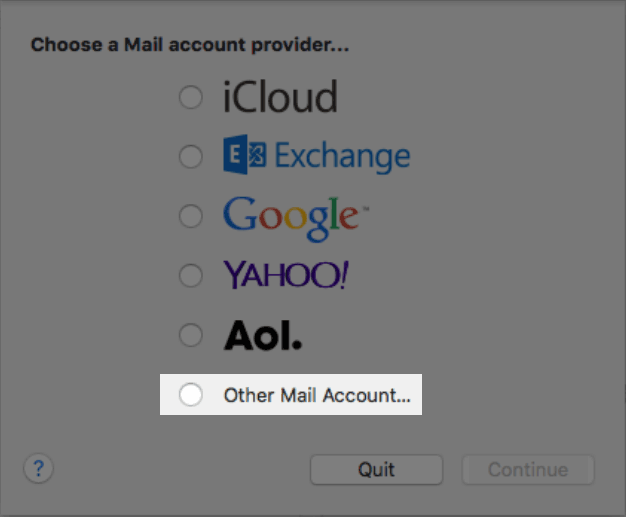
Choose
Other Mail Account...
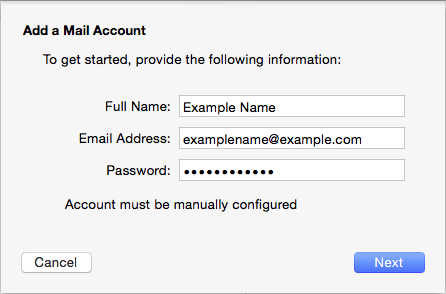
2. Enter your
Full Name or your name as you would like it to appear on your sent email.
3. Enter your Email Address.
4. Enter your email account's password.
5. Click the Next button.
6. A message should appear saying, "Account must be manually configured." Click Next.
Incoming and Outgoing Mail Server Settings
When entering the information for your Incoming Mail Server, you will need to decide if you would like to use POP3 or IMAP. POP3 will download and remove all of our server's emails, whereas IMAP will synchronize the emails between your email client(s) and our server. IMAP is recommended if you will be using this email account with multiple devices since they will all synchronize.
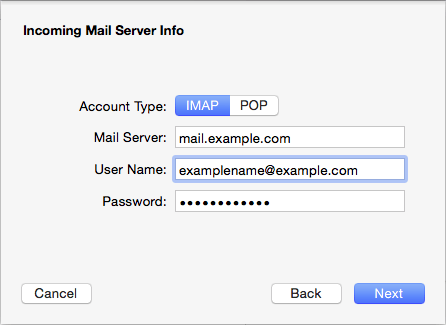
- Choose your account type, either IMAP or POP.
- Enter mail.example.com as the Incoming mail server, replacing example.com with your own domain name.
- Enter your full email address as the User Name.
- Enter the Password of your email account.
- Configure the Incoming and Outgoing Server. For more information, refer to Email Client Settings.
- Once Incoming Server settings have been configured, you will need to enter the Outgoing Mail Server (SMTP) setting.
- Click the Server Settings button. You will be prompted to further configure your Outgoing Mail Server.
- Enter the Outgoing Mail Server again.
- Choose your Server port:
- Choose Password for Authentication.
- Re-enter the full email address as the User Name and the password for that email account.
- Click the OK button when finished.
Note: If you choose to use an SSL, you may see an SSL warning.
SSL Certificate Warning
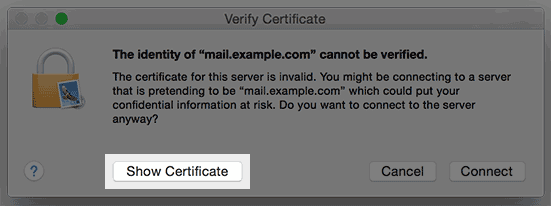
If you choose to use SSL, you may receive a message warning that the certificate is not trusted. If you receive this message, follow these steps:
- Click the Show Certificate button.
2. Check the box to Always trust the certificate.
3. Click the
Connect button.
Complete Set Up on Yosemite OS
If you're running Yosemite, we suggest following these steps to ensure your account settings don't change. This only applies to Apple computers running Yosemite.
- Choose Preferences from the Mail menu.
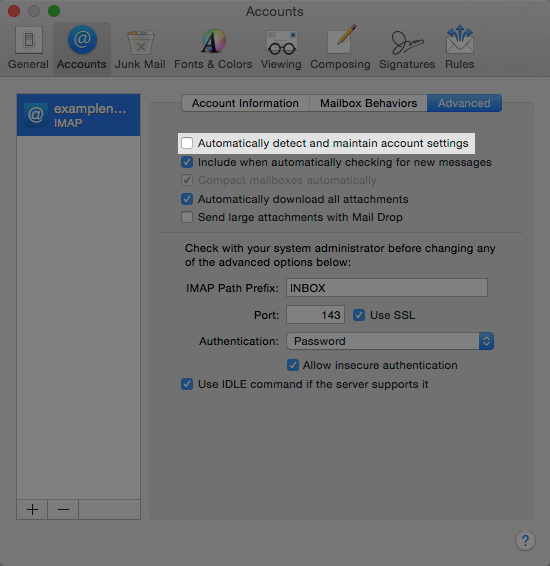
2. Click on the Accounts tab.
3. Next, click on the Advanced.
4. Uncheck the option labeled "Automatically detect and maintain settings."
5. Now click on the Account Information tab.
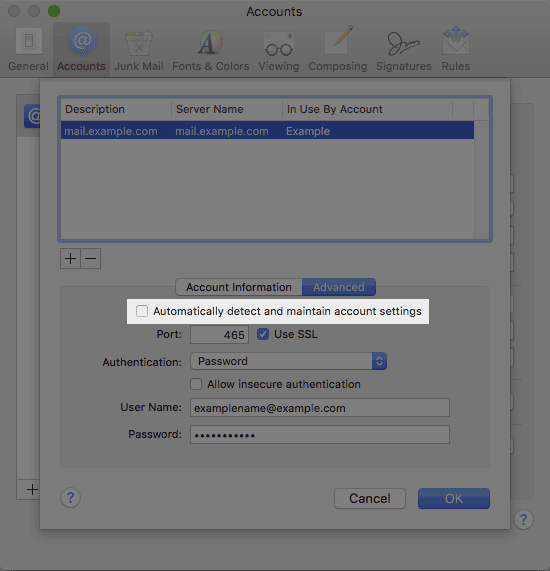
6. Under Outgoing Mail Server (SMTP), select Edit SMTP Server List.
7. Click the Advanced tab.
8. Uncheck the option labeled "Automatically detect and maintain settings."
9. Click the
OK button when finished.

