How To Setup Outlook Email Account
Add New Email Address In Outlook
Overview
The setup process is a bit different for each version of Outlook. Many of them support Autodiscover, which automatically detects some or all of the required server settings from your username and password. Click on a link from the lists below for a step-by-step tutorial specific to the version of outlook you are using.
If you aren't sure which version of Outlook you are using, see What version of Outlook do I have? for more information.
Outlook 2019 and 2016 for Windows
This article will show you how to configure your Hibu email account using Microsoft Outlook 2019. The process is similar to that of Microsoft Outlook 2016 with a few changes in UI.
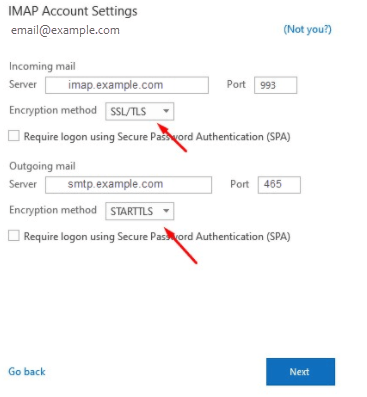
Note: We will be configuring the email account using SSL Hostnames for SMTP and IMAP protocols.
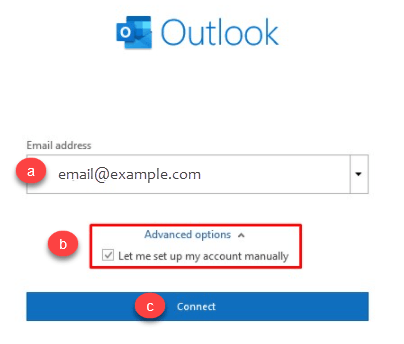
- Launch Microsoft Outlook 2019 on your computer. If you are launching it for the first time, you will directly see the window as shown below. If you have already configured some other email accounts on Outlook, you can click on File Menu > Add Account to see the window as shown below.
a. Enter your Email Address.
b. Check the box that reads, Let me set up my account manually.
c. Click on Connect.
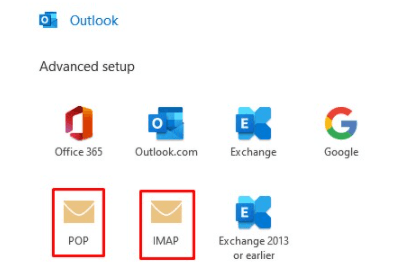
2. Select POP or IMAP depending upon the Incoming Protocol you prefer. For this example, we have selected IMAP.
3. Refer to the
Email Client Settings, and based on your preferences, enter the respective hostnames, port numbers, and encryption methods for the Incoming Mail and Outgoing Mail servers. Click on Next.
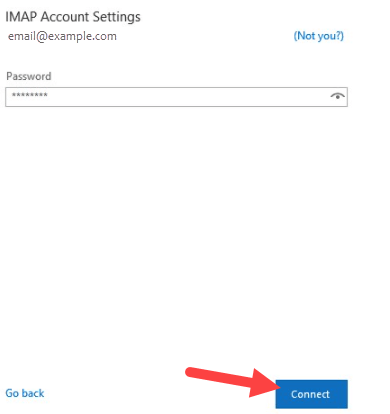
4. Enter the password for your email account with us and click on Connect.
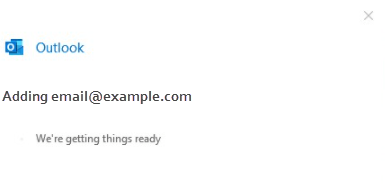
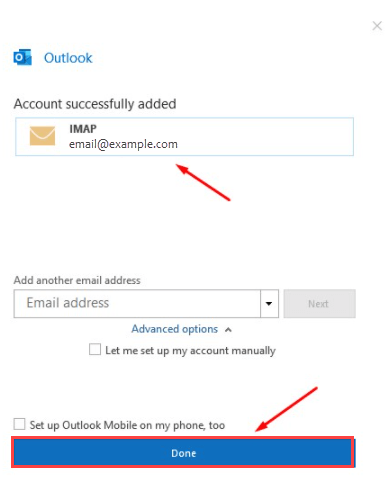
5. Your email account has been configured successfully! Click on Done to conclude the process.
Outlook 2016 for Mac
This article shows you how to set up your Hibu email account in Outlook 2016 for Mac.
Get Started
- Open Outlook 2016 from your Launchpad.
- If you've never used Outlook before, you'll be prompted to
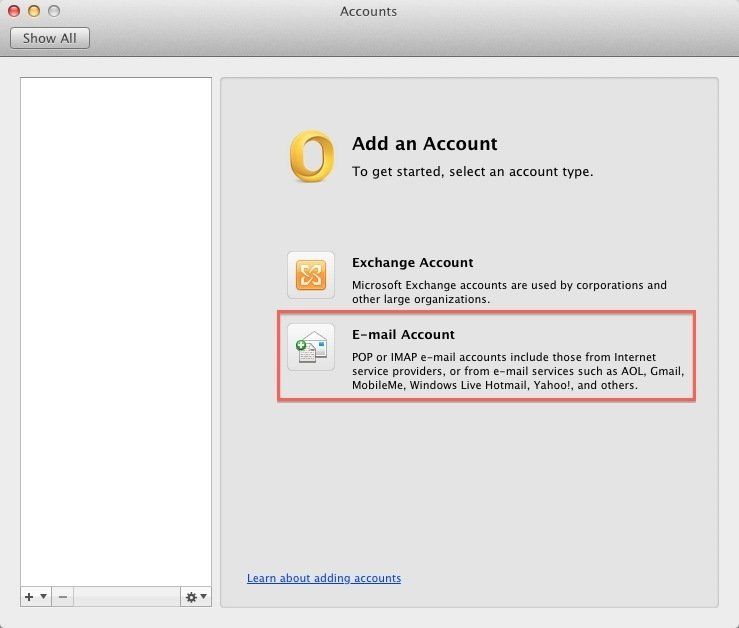
- Click the Add Account button to go to the Accounts page.
- Then, click the option for Other Email under Add An Account.
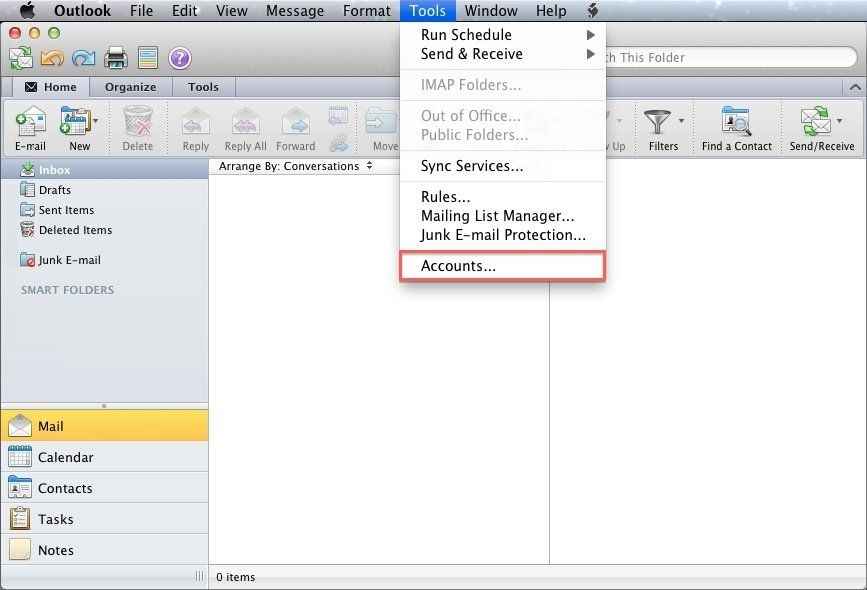
- If you've already set up Outlook before, go to the Tools menu at the top of your Outlook window.
- Click the Accounts button on the left side.
- At the bottom left of the Accounts page, click on the plus (+) sign and select
Other Email
Auto Account Setup
Outlook 2016 supports Autodiscover; it automatically configures the server settings using just your email address and password. It's that easy!
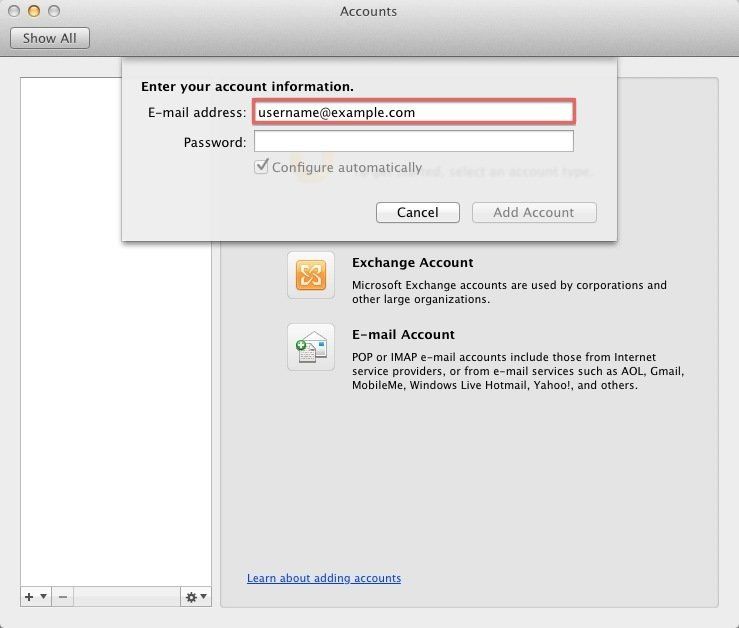
- On the Add Account screen, enter your email address in the first field.
- If Outlook determines that it can configure your email account automatically, check the Configure automatically box and then click Add Account.
- Enter your email password in the next field.
- Click Add Account.
- Outlook will connect to your mail server and auto-configure your settings for a secure IMAP connection.
Private (with SSL) Configuration
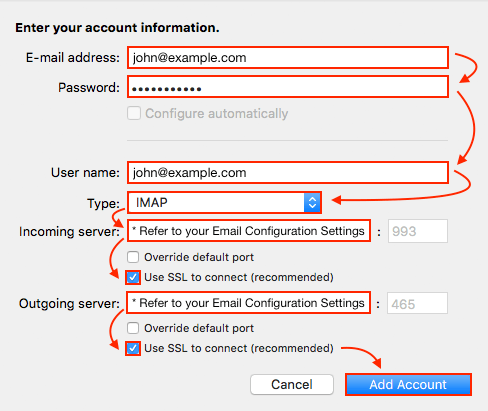
Enter the following information to configure Outlook using Private (with SSL) settings:
- Email Address: Enter your email address
- Password: Enter your email password
- User Name: Enter your email address again
- Type: Click the drop-down menu and select IMAP or POP
- Mail Servers: mail.example.com where example.com is your domain name
- SSL: Check the Use SSL to Connect boxes for the Incoming Server and Outgoing Server.
- Finally, click Add Account.
Outlook 2013 for Windows
This guide will show step-by-step instructions for setting up email on Outlook 2013 for Windows. While it can be used for other versions of Outlook, some screens and steps might vary.
Add a New Account:
- Select the File menu and choose Info
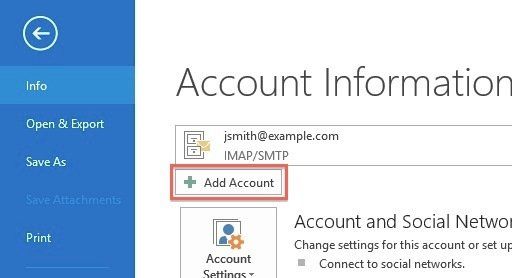
2. Click the
Add Account button.
3. Choose
Manual setup or additional server types

4. Click
Next.
5. Choose
POP or
IMAP.
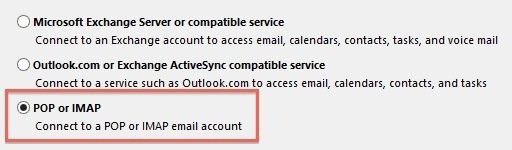
6. Click
Next.
Account Settings
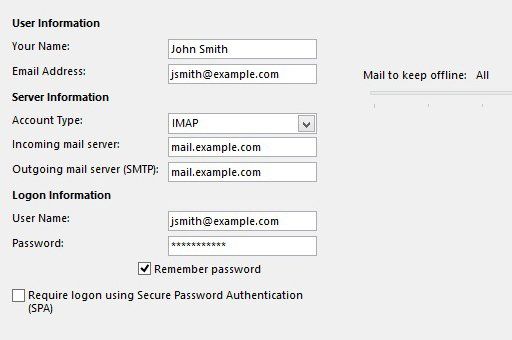
- Your Name: Enter your full name as you want it to appear on your outbound emails.
- Email Address: Enter your email address.
- Type: Click the drop-down menu and select IMAP or POP. We recommend IMAP.
- Mail Servers: mail.example.com, where example.com is your domain name.
- User Name: Enter your email address again.
- Password: Enter your email password.
- Check the box to remember your password.
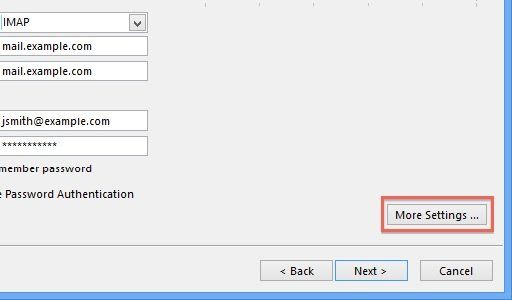
More Settings
- Click
More Settings.
2. Go to the Outgoing Server tab.
3. Check the
My outgoing server (SMTP) requires authentication
box.
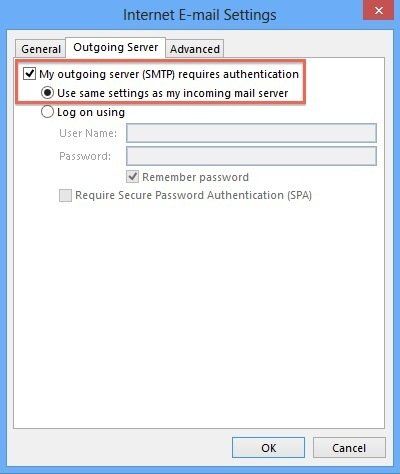
4. Make sure it's using the same settings as your incoming mail server.
5. Go to the Advanced tab.
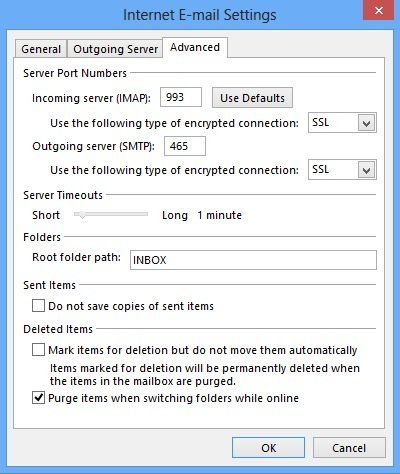
- The server port numbers you'll type here depend on the account and connection type you're setting up. Refer to your Email Configuration Settings, as necessary.
6. Click OK.
7. On the E-mail Accounts window, click Next.
8. Click
Finish.
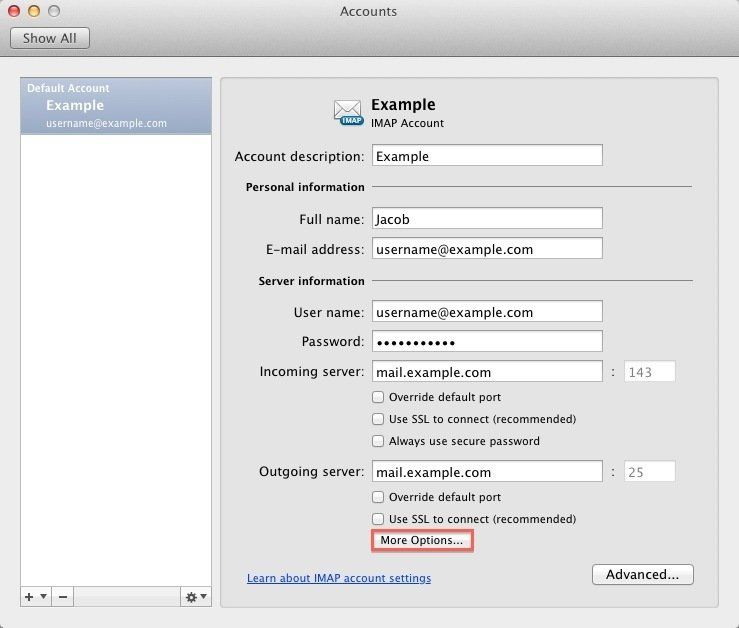
Outlook 2011 for macOS
- Open the Tools menu and choose Accounts
2. Click on E-mail Account.
3. Enter your
E-mail address: Your full email address.
4. Enter your
Password: The full case- and character-sensitive password for this email account.
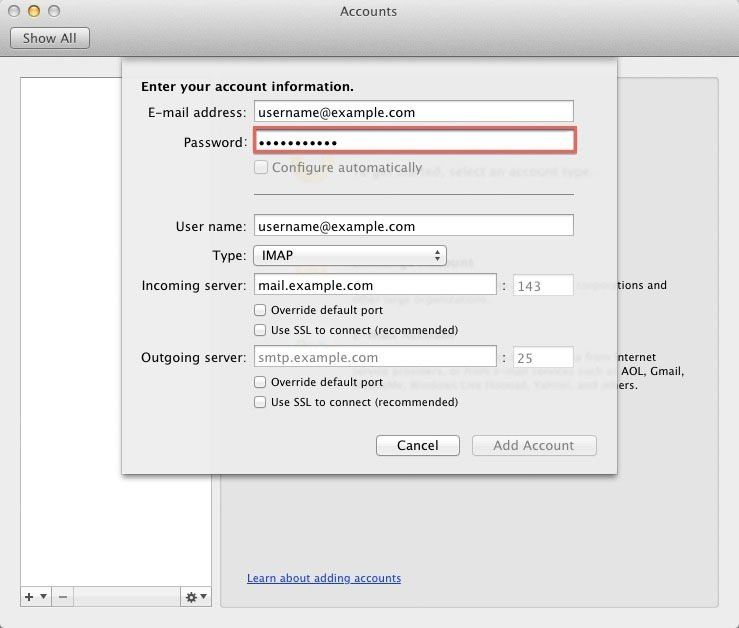
5. Enter your account User Name: Your full email address again.
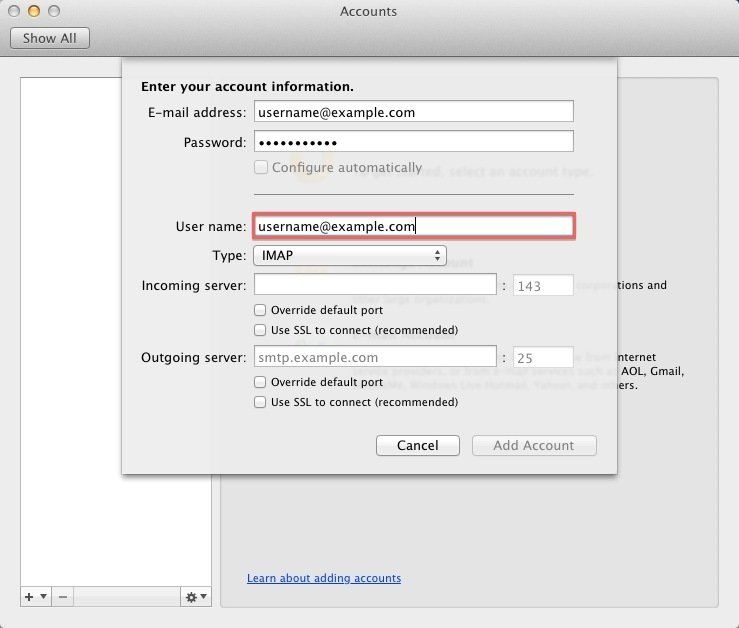
6.
Incoming server: This is typically your domain name preceded by "mail.", e.g., mail.example.com
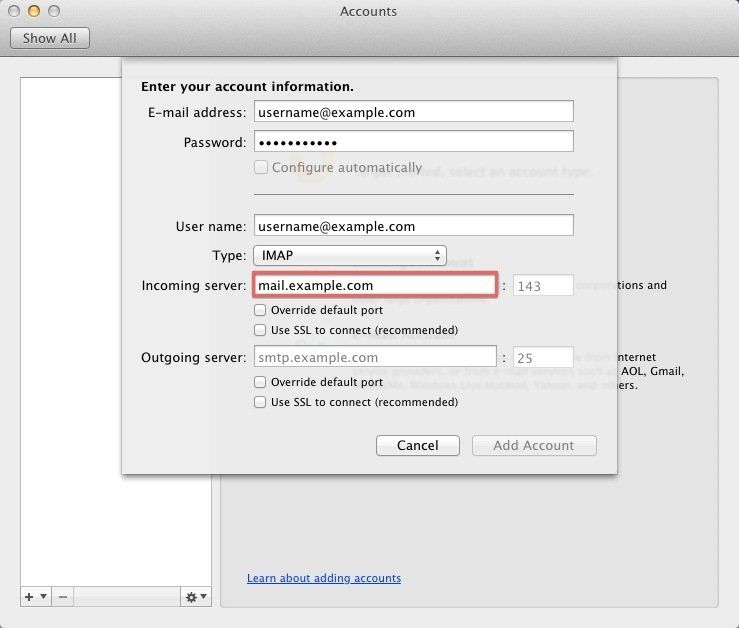
7.
Outgoing Server: This is the same as the Incoming server.
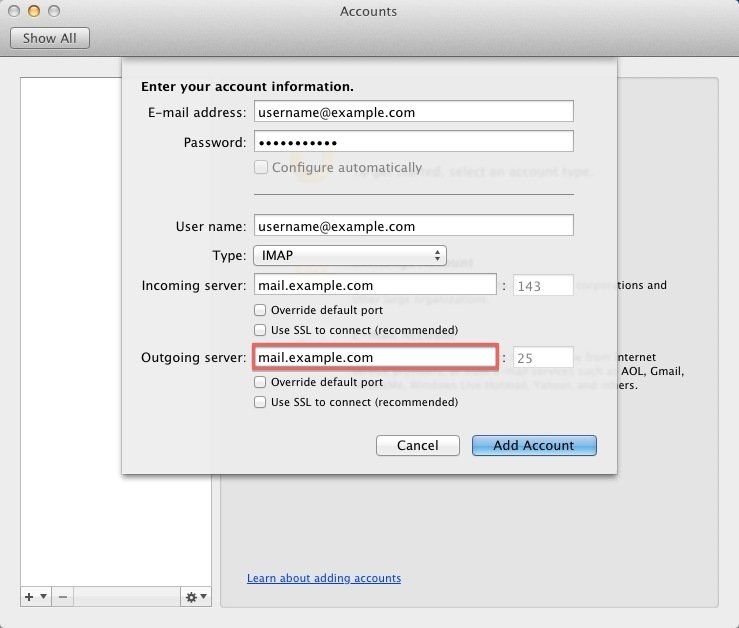
Note:
You may need to check the box to
"Override default port" and use port 26 instead of the default port 25.
8. Click the
Add Account.
Enable SMTP Authentication
Now that you've set up the email account, you need to enable SMTP Authentication.
- Open the Tools menu.
- Select the Accounts...
3. Click the E-mail Account.
4. Click the More Options... button.
5.
From the
Authentication
drop-down menu, choose Use Incoming Server Info.
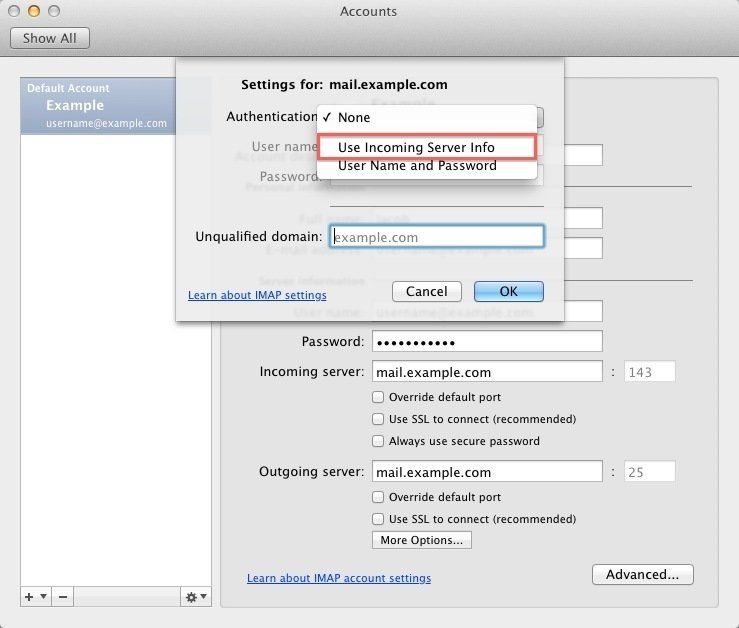
6.
Click
OK.